
Why Winter is a Surprisingly Great Time for STEM with Preschoolers
Forget the idea that STEM activities require sunshine and warm weather! Winter, with its unique conditions – snow, ice, and cold temperatures – actually presents a fantastic, natural laboratory for young scientists. It’s a time when everyday phenomena become exciting opportunities for exploration and discovery. Think about it: where else can you so easily observe states of matter changing, or investigate the properties of water in its solid form?
STEM isn’t about turning preschoolers into mini-scientists in a lab coat. It’s about encouraging curiosity, problem-solving, and critical thinking through playful experiences. These winter activities are less about "school" and more about sparking wonder. A simple snowflake observation becomes a lesson in symmetry, while building a snow fort introduces engineering concepts.
The benefits of STEM extend far beyond science, though. These activities also support fine and gross motor skill development, creative expression, and social-emotional learning. Building with blocks, manipulating small objects, and collaborating with peers all contribute to a child’s overall growth. It’s a holistic approach to learning that’s perfect for preschoolers.
What I really appreciate about winter STEM is its accessibility. Many activities require only common household materials, and even the "outdoor" ones can be adapted for indoor play with a little creativity. We'll cover a range of options in the sections that follow, ensuring there's something for every child and every climate.
Snowflake Science: Exploring Symmetry and States of Matter
Snowflakes are miniature works of art, and a fantastic starting point for STEM exploration. At their core, snowflakes form when water vapor in the air freezes into ice crystals. These crystals grow, and because of the way water molecules bond, they almost always develop a hexagonal, or six-sided, structure. It's a pretty amazing phenomenon when you think about it.
The most striking thing about snowflakes is their symmetry. Each snowflake has six identical arms, radiating from the center. This isn’t just a visual observation; it's a fundamental principle of physics. A fun activity is to venture outside with dark construction paper and magnifying glasses. Encourage children to carefully catch snowflakes and observe their intricate designs.
Snowflakes also provide a perfect example of states of matter. We know snow is water, but in a solid form. A simple experiment to illustrate this is to place a snowflake on a dark surface indoors and watch what happens. It won’t stay a snowflake for long! It will begin to melt, transitioning from a solid to a liquid. You can discuss how the warmth of the room speeds up this process.
To extend the lesson, try placing snowflakes in different locations within the room – near a window, near a heater, or in a cooler spot. Ask children to predict which snowflake will melt fastest and why. This introduces the concept of temperature and its effect on the rate of change. It’s a simple experiment, but it’s packed with learning opportunities.
Ice Investigations: Density, Freezing, and Color Mixing
Ice is another readily available material for winter STEM explorations. Let’s start with density. Ask children what they think will happen when you place ice cubes in a glass of water. They’ll likely observe that the ice floats. Why? Because ice is less dense than liquid water. This means that for the same volume, ice weighs less.
You can further explore freezing by conducting a simple experiment. Fill two identical containers with water. Place one in the freezer and the other outside (if it's cold enough). Ask children to predict which one will freeze first and why. This introduces the idea that temperature and exposure time affect the rate of freezing. Keeping a chart to document the time it takes to freeze is a good way to practice observation skills.
To add a splash of color and explore mixing, add a few drops of food coloring to water before freezing it. This will create rainbow ice blocks. As the ice melts, discuss how the colors blend together. This demonstrates a basic principle of color mixing and allows children to observe the change in color as the state of matter transitions.
It’s important to acknowledge that results may vary. Sometimes the ice won’t freeze perfectly, or the colors might not mix as expected. That’s okay! It’s part of the scientific process. Encourage children to observe what actually happens, and to discuss why the results might be different from their predictions.
Indoor Snow Fun: Building and Creating Without the Cold
Not everyone has access to real snow, or the weather might not cooperate. Fortunately, there are plenty of indoor activities that capture the spirit of winter STEM. Magnetic tiles are a fantastic option. Challenge children to build a snow fort using the tiles. How tall can they make it? How stable is the structure? What shapes work best?
For a fine motor skill challenge, introduce Q-tip snowflakes. Provide white Q-tips and a dark surface (construction paper or a paper plate). Children can use the Q-tips to create snowflake designs, reinforcing shape recognition and hand-eye coordination. This activity is also great for developing patience and concentration.
Geoboards are another versatile tool. Provide rubber bands and encourage children to create winter patterns – snowflakes, snowmen, or even abstract designs inspired by winter landscapes. This activity combines geometry with creativity and problem-solving skills. It’s a surprisingly engaging way to learn about shapes and spatial relationships.
I’m a little hesitant to recommend making "artificial snow" with baking soda and shaving cream, as it can get incredibly messy. However, it can be a fun option for older preschoolers with close adult supervision. It provides a sensory experience and allows children to explore the texture and properties of a snow-like substance.
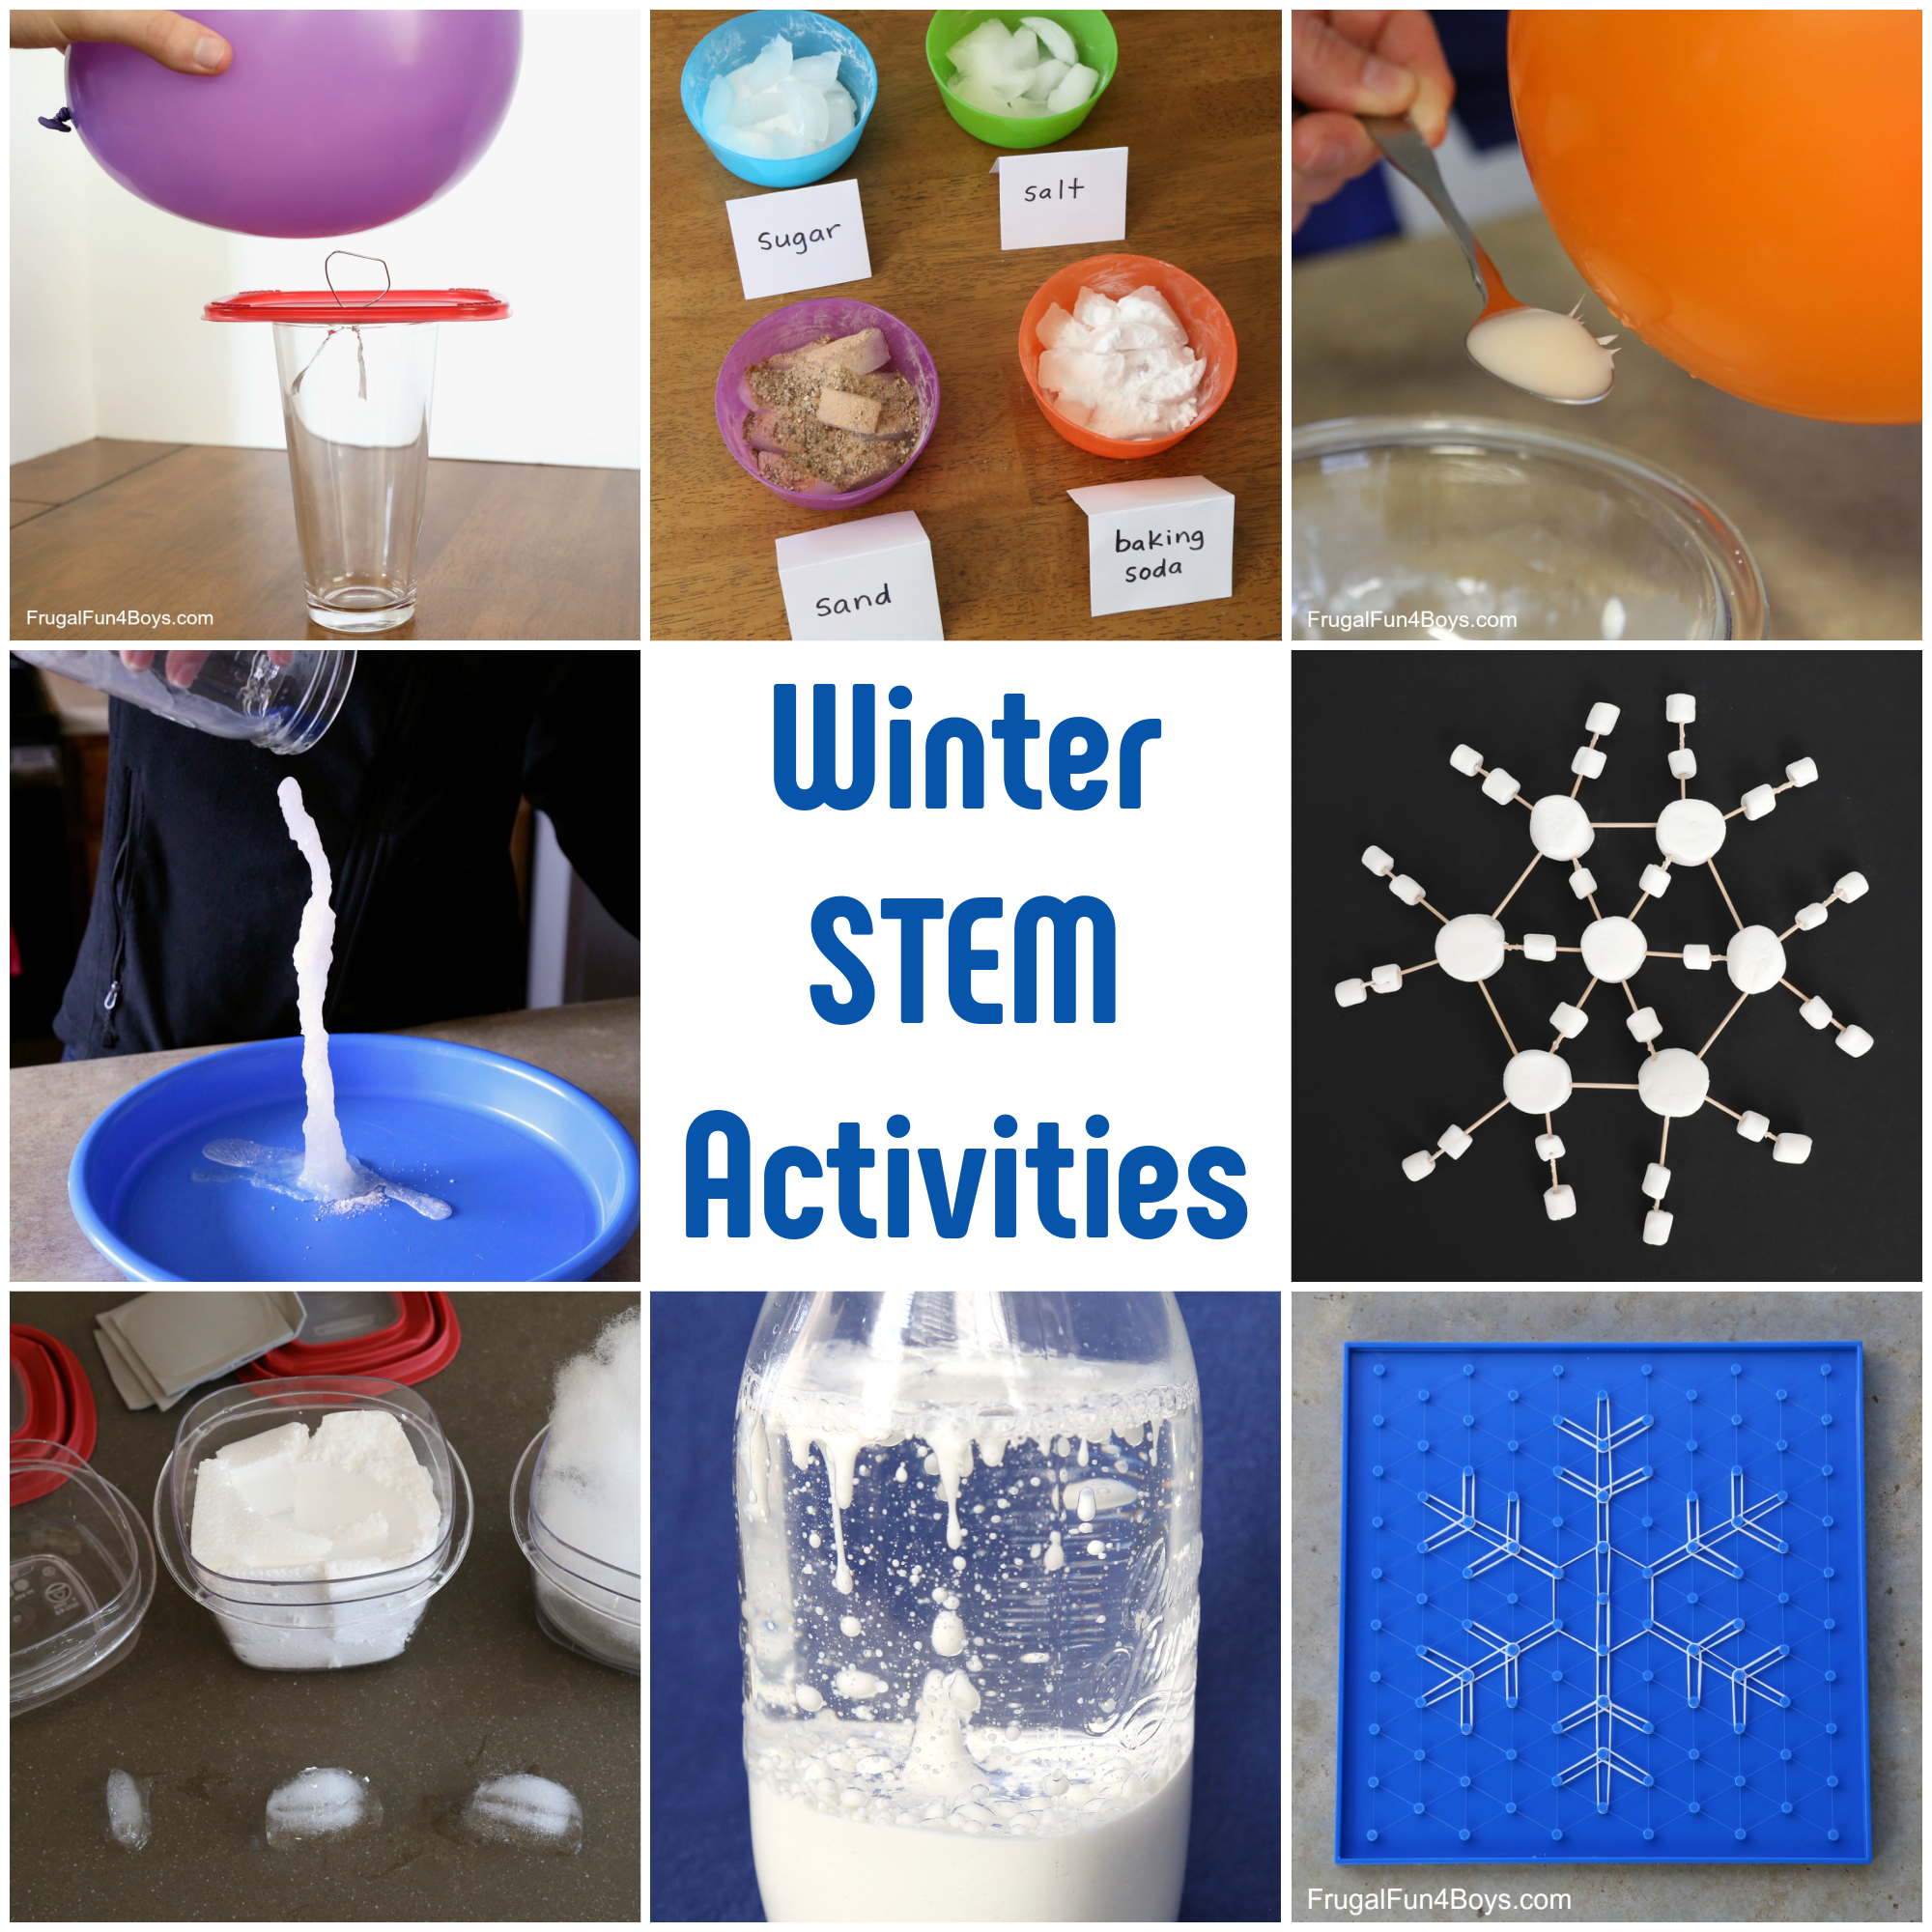
15 Winter STEM Activities
- Rainbow Snow - Explore color mixing by adding food coloring (like McCormick Food Colors) to small containers of snow. Discuss how different colors are made.
- Ice Melting Race - Compare how quickly ice cubes melt in different locations (sunlight, shade, indoors). Use cups from Rubbermaid Brilliance to contain the melting water.
- Freezing Bubbles - On a very cold day (below freezing!), try blowing bubbles with a bubble solution (like Gazillion Bubbles) and watch them freeze!
- Snow Volcano - Build a 'snow volcano' using snow and a small container. Add baking soda and vinegar for a fizzy eruption. Use Arm & Hammer baking soda and Heinz vinegar.
- Q-Tip Snowflakes - Develop fine motor skills by creating snowflakes with Q-tips (from Swabs USA) and glue on dark construction paper. Find a printable snowflake template here.
- Geoboard Winter Patterns - Use a geoboard (available from Learning Resources) and rubber bands to create winter-themed patterns, like snowflakes or snowmen.
- Magnetic Tile Snow Forts - Encourage spatial reasoning by building snow forts and structures with magnetic tiles (like Magna-Tiles).
- Snowflake Observation - Catch real snowflakes on dark fabric and observe their unique shapes with a magnifying glass (from AmScope).
Snow Volcanoes and Fizzy Reactions: A Chemical Exploration
Let’s add a little drama to our STEM explorations with a snow volcano! This activity combines the fun of building with a fascinating chemical reaction. Start by building a snow pile (or use a container filled with artificial snow) and create a crater in the center. Place a small container, like a plastic cup, inside the crater.
Now for the eruption! Add a few tablespoons of baking soda to the container. Then, slowly pour in vinegar. Watch what happens! The baking soda and vinegar will react, creating carbon dioxide gas, which will cause the “volcano” to erupt. It’s a simple but spectacular demonstration of a chemical reaction.
The reaction between baking soda (a base) and vinegar (an acid) is a classic science experiment. Explain to children that the bubbling and fizzing are caused by the release of carbon dioxide gas. This is the same gas that makes soda fizzy, and it's also what powers real volcanoes (though on a much larger scale).
Safety is paramount. Adult supervision is essential, especially when handling vinegar. It’s also okay if the eruption isn’t perfect. The point isn’t to create a perfectly realistic volcano, but to observe the reaction and learn about the properties of acids and bases. Encourage children to ask questions and explore the process.
Engineering with Winter Themes: Building Challenges
Engineering challenges encourage preschoolers to think creatively and problem-solve. Present a challenge: can you build a snowman that can withstand a "snowstorm"? Provide materials like cotton balls, marshmallows, playdough, and toothpicks. Then, use a fan to simulate the wind. What materials work best for building a sturdy snowman?
Another challenge is to build a bridge out of popsicle sticks that can hold a certain number of small plastic animals. Encourage children to experiment with different designs and structures. How can they make the bridge stronger? What shapes provide the most support?
I think it’s incredibly important to let children fail. Failure is a valuable learning opportunity. If their snowman falls over or their bridge collapses, encourage them to analyze what went wrong and try again. This process of trial and error is fundamental to engineering.
Discuss the importance of planning and problem-solving. Ask children to describe their designs and explain why they chose certain materials. This helps them to articulate their thinking and develop their communication skills. It's about the process, not just the end result.
Art Meets Science: Frozen Painting and Sensory Exploration
Let’s combine art and science! Frozen paint is a fun and unique way to explore color and texture. Simply freeze water with a few drops of paint in ice cube trays. Once frozen, provide the paint cubes and paper. How does frozen paint feel different than regular paint? What happens as it melts?
Create a winter-themed sensory bin filled with fake snow (you can buy this or make your own), small plastic animals (penguins, polar bears, etc.), and scoops. Encourage preschoolers to explore the textures and materials. What does the snow feel like? How can they use the scoops to move the snow around?
This is also a great opportunity to discuss color mixing. Encourage children to experiment with different colors of frozen paint. What happens when they mix blue and white? What about red and white? This reinforces the concept of color mixing in a hands-on, engaging way.
These activities encourage creativity and observation. They also provide opportunities for children to develop their fine motor skills and sensory awareness. It’s a wonderful way to integrate art and science in a meaningful and playful way.
Adapting Activities for Different Ages and Abilities
Preschoolers develop at different rates, and it’s important to adapt activities to meet their individual needs. For younger children, simplify the experiments and provide more assistance. For example, when building a snow volcano, you might do most of the building yourself and let them add the vinegar.
For older preschoolers, encourage them to ask more questions and explore more independently. Challenge them to design their own experiments or to come up with alternative solutions to problems. They might be able to measure ingredients or record their observations in a simple journal.
It’s also important to consider children with different abilities. Some children might need adaptive tools or modified instructions. For example, a child with limited fine motor skills might benefit from using larger Q-tips or a geoboard with larger holes. Be flexible and willing to adjust the activities as needed.
I feel strongly about making STEM accessible to everyone. The goal is to spark curiosity and foster a love of learning, not to create a competitive environment. By providing a supportive and inclusive environment, we can ensure that all children have the opportunity to explore the wonders of STEM.

No comments yet. Be the first to share your thoughts!